How to Create a Tailwind CSS Gradient Generator
Learn how to create a Tailwind gradient generator tool.
Introduction
Tailwind CSS is a powerful tool, but creating gradients can sometimes be a bit of a hassle. What if you could generate them effortlessly? In this guide, we'll dive into creating a Tailwind gradient generator that will save you time and make your designs pop!
Let's get started.
Understanding Tailwind CSS Gradients
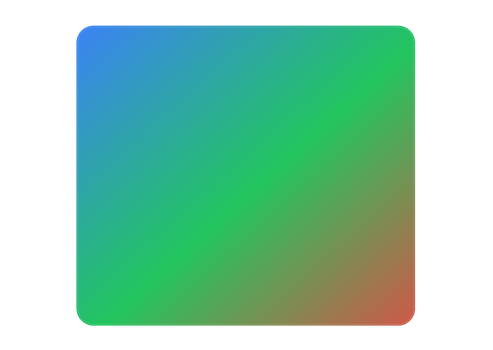
To create a gradient generator, we first need to understand how Tailwind CSS handles gradients. Tailwind CSS uses utility classes to apply styles directly in your HTML. For gradients, it provides several classes such as bg-gradient-to-r, from-blue-500, via-green-500, and to-red-500. These classes define the direction and colors of the gradient.
Tailwind CSS Gradient Classes
Here's a quick overview of some common Tailwind CSS gradient classes:
Direction Classes:
bg-gradient-to-t,bg-gradient-to-tr,bg-gradient-to-r,bg-gradient-to-br,bg-gradient-to-b,bg-gradient-to-bl,bg-gradient-to-l,bg-gradient-to-tlColor Stops:
from-{color},via-{color},to-{color}
Example Gradient
<div class="bg-gradient-to-r from-blue-500 via-green-500 to-red-500">
  <!-- Content here -->
</div>
This code snippet creates a gradient that transitions from blue to green to red from left to right.
Creating the Gradient Generator Interface
Now that we have our project set up, let's create the user interface for our gradient generator.
HTML Structure
We'll start with a simple HTML structure. Create an index.html file and add the following code:
<!DOCTYPE html>
<html lang="en">
<head>
  <meta charset="UTF-8">
  <meta name="viewport" content="width=device-width, initial-scale=1.0">
  <title>Tailwind CSS Gradient Generator</title>
  <link href="styles.css" rel="stylesheet">
</head>
<body class="bg-gray-100 flex items-center justify-center min-h-screen">
  <div class="bg-white p-8 rounded shadow-lg max-w-lg mx-auto">
    <h1 class="text-2xl font-bold mb-4">Tailwind CSS Gradient Generator</h1>
    <form id="gradient-form">
      <div class="mb-4">
        <label for="direction" class="block text-gray-700">Direction</label>
        <select id="direction" class="block w-full mt-1 p-2 border rounded">
          <option value="to-r">Right</option>
          <option value="to-l">Left</option>
          <option value="to-t">Top</option>
          <option value="to-b">Bottom</option>
          <option value="to-tr">Top Right</option>
          <option value="to-tl">Top Left</option>
          <option value="to-br">Bottom Right</option>
          <option value="to-bl">Bottom Left</option>
        </select>
      </div>
      <div class="mb-4">
        <label for="from-color" class="block text-gray-700">From Color</label>
        <input type="text" id="from-color" class="block w-full mt-1 p-2 border rounded" placeholder="e.g., blue-500">
      </div>
      <div class="mb-4">
        <label for="via-color" class="block text-gray-700">Via Color</label>
        <input type="text" id="via-color" class="block w-full mt-1 p-2 border rounded" placeholder="e.g., green-500">
      </div>
      <div class="mb-4">
        <label for="to-color" class="block text-gray-700">To Color</label>
        <input type="text" id="to-color" class="block w-full mt-1 p-2 border rounded" placeholder="e.g., red-500">
      </div>
      <button type="submit" class="bg-blue-500 text-white px-4 py-2 rounded">Generate Gradient</button>
    </    </form>
    <div id="gradient-preview" class="mt-8 p-4 rounded border">
      <p class="text-gray-700">Your gradient will appear here.</p>
    </div>
    <div class="mt-4">
      <code id="gradient-code" class="block p-2 bg-gray-200 rounded"></code>
    </div>
  </div>
  <script src="script.js"></script>
</body>
</html>
CSS for Styling
Next, let's add some basic styles with Tailwind CSS. Create a styles.css file and include the following:
@tailwind base;
@tailwind components;
@tailwind utilities;
JavaScript for Functionality
Now, let's add the JavaScript to handle the form submission and generate the gradient. Create a script.js file and add the following:
document.getElementById('gradient-form').addEventListener('submit', function(event) {
  event.preventDefault();

  const direction = document.getElementById('direction').value;
  const fromColor = document.getElementById('from-color').value;
  const viaColor = document.getElementById('via-color').value;
  const toColor = document.getElementById('to-color').value;

  const gradientClass = `bg-gradient-${direction} from-${fromColor} via-${viaColor} to-${toColor}`;

  // Apply gradient class to the preview div
  const gradientPreview = document.getElementById('gradient-preview');
  gradientPreview.className = `mt-8 p-4 rounded border ${gradientClass}`;
  gradientPreview.innerHTML = '<p class="text-white">This is your gradient!</p>';

  // Display the generated class code
  const gradientCode = document.getElementById('gradient-code');
  gradientCode.textContent = `<div class="${gradientClass}"> ... </div>`;
});
Adding Advanced Features
To make our gradient generator even more powerful, let's add a few more features:
Color Pickers
Replace the text inputs for colors with color pickers for a more user-friendly experience. Update the HTML as follows:
<div class="mb-4">
  <label for="from-color" class="block text-gray-700">From Color</label>
  <input type="color" id="from-color" class="block w-full mt-1 p-2 border rounded">
</div>
<div class="mb-4">
  <label for="via-color" class="block text-gray-700">Via Color</label>
  <input type="color" id="via-color" class="block w-full mt-1 p-2 border rounded">
</div>
<div class="mb-4">
  <label for="to-color" class="block text-gray-700">To Color</label>
  <input type="color" id="to-color" class="block w-full mt-1 p-2 border rounded">
</div>
Copy to Clipboard
Add a button to copy the generated gradient class to the clipboard. Update the HTML and JavaScript as follows:
<div class="mt-4">
  <code id="gradient-code" class="block p-2 bg-gray-200 rounded"></code>
  <button id="copy-button" class="bg-green-500 text-white px-4 py-2 rounded mt-2">Copy to Clipboard</button>
</div>
document.getElementById('copy-button').addEventListener('click', function() {
const gradientCode = document.getElementById('gradient-code').textContent;
navigator.clipboard.writeText(gradientCode).then(function() {
alert('Gradient class copied to clipboard!');
}, function(err) {
console.error('Could not copy text: ', err);
});
});Conclusion
Creating a Tailwind CSS gradient generator is a fantastic way to streamline your design process and produce stunning gradients quickly. By following this guide, you now have a functional gradient generator that can be further customized and expanded upon. Happy coding!
FAQ
Can I use custom colors in my gradients?
Yes, you can use custom colors by defining them in your tailwind.config.js file under the extend section. This allows you to use those custom colors in your gradients.

Yucel is a digital product creator and content writer with a knack for full-stack development. He loves blending technical know-how with engaging storytelling to build practical, user-friendly solutions. When he's not coding or writing, you'll likely find him exploring new tech trends or getting inspired by nature.